
HOME / POSTS / WAKEBOARD FOR BIANCHINIS
Wakeboard for Bianchinis
July 2017 Bianchini-Love
If you know the Bianchinis, you know that they love water sports. After spending time with the Bianchinis during the summer of 2017, Henry wanted to create a gift for them. Henry's Crocs are a point of contention between him and Mrs. Bianchini, so (mostly) as a joke, he decided to create a wakeboard with boots as Crocs. Please note that this wakeboard is not intended to be used as a real wakeboard; it's intended to be a wall piece, or a funny item. As one of the smallest people you'll ever meet, the boots and wakeboard are sized to fit Mrs. Bianchini's (with maybe a bit of exaggeration...) since Henry noticed all but she had a wakeboard to use.
Conception
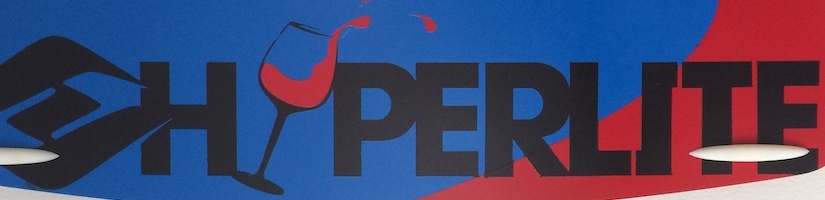
The idea of this project is to create a wakeboard for Mrs. Bianchini. The constraints were: small enough to fit her, Crocs as boots (of course), and a personal design. Hyperlite is a standard when it comes to wakeboards, thus their logo was incorporated into the design to make this miniature wakeboard more "authentic".

Crocs used for the boots of the wakeboard. Hand for scale.
Design
The design of the wakeboard is broken up into two sections: the fin/peg design (which is mostly 3D in nature) and the board design (which is mostly 2D in nature). All the CAD was performed using Autodesk Fusion 360.
Fin/Peg
Some wakeboards have fins on the underside of the board that help keep the board oriented while in use. The fins for this wakeboard were loosely modeled in CAD, imitating the rough shape of standard wakeboard fins. The fins on this wakeboard are widened a bit to facilitate attaching them to the finished board. The wakeboard has a total of 4 fins. Each fin has two pegs that fasten them to the board.


3D model of a wakeboard fin: 1) side view, 2) top view, 3) bottom view (with peg holds visible).

Peg to keep fins in place.
Board
The design of the board consisted primarily of .dxf files for the waterjet and vinyl cutter. To keep things simple, a paint job of only three colors was used.


Design flow of the CAD: 1) board outline trace, 2) graphics trace, 3) back design, 4) front design.
In order for the project to remain feasible, the design of the wakeboard was kept simple. First, the profile of the wakeboard was traced from an image acquired from the internet. A quarter of the wakeboard was traced in CAD, and the full board was realized by mirroring. Next, graphics from the internet were used to for the logo and unique attributes (the images used are included in the "images.zip" file included in the "Project Documents" section). Since Italians (the Bianchinis) are no stranger to wine, it seemed fitting to replace the rather oddly-shaped "Y" in "HYPERLITE" for a wine glass. The wine/wine drops were free-handed using splines to create the final image/drawing. An observant reader may recognize that the front design is very similar to the back design; this reduced the amount of tedious CAD work necessary to create the paint masks. Large "swoops" were added to the front and back of the wakeboard to liven it up and give it a more "sporty" feel.
Fabrication
The fabrication of the wakeboard consisted of three main tools: a 3D printer, a waterjet, and a vinyl cutter. In addition, spray paint was used to color the bare aluminum board. A 3D printer was used to create plastic fins to mimic the fins on a traditional wakeboard, the waterjet was used to cut the board outline, and the vinyl cutter was used to create the color masks for the paint job.
3D Printing
The fins of the wakeboard were created by roughly copying the profile of a standard wakeboard fin. The fins and pegs were printed on a Stratasys uPrint SE in MIT MakerLodge.

Fins and pegs after 3D printing.
Waterjetting
The profile of a wakeboard was traced in CAD to produce the board outline and ensure proper scaling. In addition to the board outline, holes were cut in the board to allow the 3D printed fins to attach to the final product.


Aluminum board after waterjetting.
The wakeboard shape was cut from 1/8" sheet aluminum and afterwards was bent to assume a more realistic wakeboard shape. This was done slowly using a sheet metal roller to created an even bend in the material. Once bent, the entire surface was prepared for painting by sanding lightly using sandpaper and washing thoroughly with warm water and soap to remove any residual grease/oil.
Vinyl Cutting
Spray paint was used to add color the the bare aluminum wakeboard. A vinyl cutter was used to create masks for the color layers of the wakeboard. Vinyl stickers were not used for the graphics as it is very difficult to apply vinyl on a curved surface (the wakeboard) without adding a lot of bubbles underneath the vinyl. Bubbles are fine in the temporary paint masks. Blue, red and black were used to color the board. Since the base color is blue (the entire board is coated in it), only vinyl masks for the red and black layers needed to be made.

Vinyl mask for the front red layer.

Vinyl mask for the back red layer. In this image, the bubbling in the vinyl is very obvious; as long as there are minimal bubbles by the edges of the vinyl, bubbles have minor impact on the painting.

Vinyl mask for the front black layer. The exposed red (exposed for alignment purposes) was covered after this picture was taken.

Vinyl mask for the back black layer.
Spray Painting
With the help of the vinyl masks, the entire board was spray painted to add styling. No primer was necessary as the spray paint used was advertised as paint + primer. The order of painting is as follows:
- Entire board sprayed blue.
- Red vinyl masks applied to front and back and the board painted red.
- Coat of clear paint applied to prevent red layer from peeling up with black vinyl mask.
- Black vinyl masks applied to front and back and the entire board painted black.
- (Repeat step 4 because the first attempt was unsuccessful...)
Each paint layer was given 48hrs to dry before applying the next color. Everything worked perfectly until the black vinyl mask was removed. The clear coat mentioned in "3" above seemed to degrade the adhesion of the black layer to the blue paint layer. Interestingly enough, the black paint adhered to the red paint (on the back) very well. Therefore, when the black mask was removed, the majority of the black paint on the blue was also peeled up. Luckily, the wakeboard could be salvaged as remaining black paint on the blue layer could be easily peeled up. When trying the black paint layer a second time, the vinyl mask was aligned with any black that remained from the first attempt.

Initial blue base layer hang-drying.

Clear coating after red layer.

Unsuccessful first black layer. This image shows the back design; the front black layer completely peeled up due to poor adhesion to the prior paint layer. However, one can see that the black paint adhered to the red sections without any problem (these black sections were not peeled up).

Attempt two on front black layer. Much better!

A teaser!

Attempt two on back black layer. Also much better!
Assembly
After all painting was complete, and the board was given adequate time to dry, the wakeboard was assembled. First, Krazy Glue was used to attach the 3D printed fins to the aluminum board. Glue was only applied to the 3D printed parts, and not the wakeboard; the pegs kept the fins fastened to the board. Next, Velcro was used to attach the Crocs to the board. The fuzzy side of the Velcro was attached to the shoes to prevent the risk of scratching the paint when trying to press the shoes onto the wakeboard. Additional Krazy Glue was used to ensure adequate adhesion of the Velcro to the Crocs (which was poor without the Krazy Glue). Next, corresponding Velcro squares were attached to the aluminum board, offset a bit from the center line of the board to ensure that the Crocs were aligned correctly. The images below show the process and the final result.

Finished front without Crocs.

Applying Velcro to the front.


The final wakeboard with Crocs.

The finished wakeboard hanging in the Bianchini's home along with other water sport gear.