
HOME / POSTS / WALL LIGHT
Wall Light
April 2019 Love
When I was walking back to my dorm after class, I found a beautiful piece of wood outside the MIT 2.008 machine shop being thrown away with a bunch of other things. It was once a block of wood for holding endmills/bits with a natural patina from years of machine oil and grease. The wood block had some small aluminum chips embedded in it, however, I didn’t try to get those out, because they tell its story as a block of wood from an MIT machine shop. This was too good to pass up, so I grabbed it. After some thinking, I decided to make a wall lamp out of the piece of wood and made it a (late… oops…) gift for Bibit’s 23rd birthday.
Overview
I am a bit hesitant to call this a wall lamp, as it does not emit very much light - at least when used as it is intended to be used. This is more of a wall ornament/aesthetic piece that adds some ambiance to a room/area. For Bibit, this is perfect, as she is not a fan of bright lights.

Holding up the wood to the wall gave me the inspiration to back-light it with some warm LED's. The beautiful wood grain is visible in this picture.


The original two sides of the block of wood.
Mechanical Construction
The mechanical construction of this lamp was relatively straightforward. I decided cover the holes with canvas to diffuse the light coming from behind the wood. Canvas naturally has a yellow-ish tint to it, so I thought this could compliment the warm white lights. I bought some 7oz canvas from Blick, and cut 32 individual circles to be put in each pocket. Each pocket is approximately 1.25” in diameter, so I laser cut some 1.2” clear acrylic disks which made a tight fit with the pocket when the canvas was sandwiched between the wood and the acrylic. This held the canvas snug in the pocket, while also ensuring the canvas stayed taut.

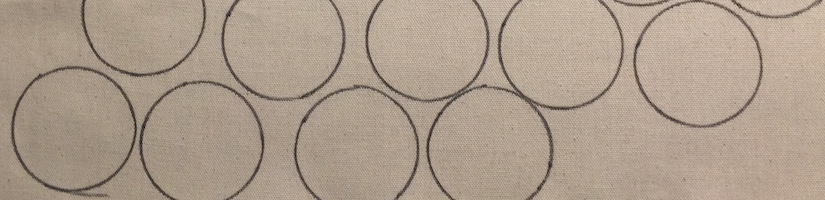
A jar was used to trace circles onto 7 oz canvas.

32 circles were cut (only 23 all are shown in this picture).

The canvas circles were stuffed into the large holes in the back, held in place by the clear acrylic disks.
Electronics
The electronics driving the LED’s are pretty simple; I decided to go with a “plug and play” solution for this (from Amazon) because of limited time and also because what I found was super cool. The LED’s can be controlled in two ways: with an app on your phone, or an IR remote that is included with the LED dongle. To use the app; download it here. DO NOT scan the QR code on the dongle, this led to an app I had trouble with. After the app is downloaded, and the dongle is plugged into a power source, connect the the wifi network: “LEDnetxxxxxx”. Once connected, you can go to the app and direct connect to the LED’s to control the colors/effects! You can even play music through your phone and have the LED’s respond to it, though it’s not the best light show in the world. Using the IR remote is pretty self-explanatory - it’s a simple point and click operation. Of course, since it is IR, the downside is that the remote requires line-of-sight to the receiver in order for it to work.
LED's
The LED’s are RGBW LED’s, which means they’re your typical RGB LED, with an additional white LED. The white LED is used to create a more “natural” white as the RGB may not combine to make a white that is appealing to the eye. Whites come in different flavors: “warmer” white and “cooler” white. The LED’s used here have a “warm” white LED, so the light is more orange-y, and has less blue in it. The “warmness” of the light is quantified by units of “Kelvin” and, contrary to what you’d expect; “warmer” (2600K - 3000K) corresponds to a lower Kelvin value than “cooler” white light (6000K - 7000K). This counter-intuitive labeling is because of society’s notion that blue = cold and red = hot. In science, however, hotter objects emitter higher energy black-body radiation than cooler objects. In the electromagnetic spectrum, blue light is higher energy than orange/red light, thus, objects that emit blue light (which we, as society, associate with “cool”) are actually hotter than objects that objects that emit red light (which we, as society, associate with warm/hot). But I have digressed…
I played a bit with the lighting arrangement; i.e. how many strips of LED’s to use, or if each “pocket” should have it’s own dedicated LED light. Adafruit sells LED lights referred to as NeoPixels, which are individually addressable LED’s which allow the LED’s to have different colors than their neighbors. While I experimented with this, it seemed a bit overkill for this project and would have added some complexity to the build, including firmware and some power electronics. The plug and play solution from amazon was simply too appealing.
3 LED strips were cut to size and the adhesive that came with the LED strip was used to fasten the LED’s to aluminum strips nailed into the wood (once used for labeling the endmills sizes in its other life). Electrical wire was cut and soldered to each LED strip to route power to all the LED’s. Finally, heat-shrink tubing was used to prevent shorts and provide a finished look.


Before the final LED configuration was determined, I had some fun with the RGBW effects. Only one strip of LED's in between the two leftmost columns of holes is being used to illuminate the lamp from behind.

The final LED arrangement - three LED strips wired in series between each column of holes.


The lamp turned off (on the left) and the finished lamp turned on (right).

The lamp illuminated in Bibit's dorm room. Happy Birthday!